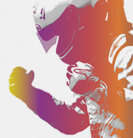
dtack68 Posted August 12, 2011 Share Posted August 12, 2011 That's right! And guess what? I'm giving it to you guys for free! Comparison: Here is an example of the customization I know it doesn't look good, but it's what you can do with it. Do note this, though: I made it in Photoshop CS5 and I can't test to make sure it works in any other version, so if there are issues, please tell me :) Confirmed: CS4 & CS3 Included in the PSD is a completely vector (meaning ready for print) version of the cover. I had to remake the background textures and they are also resizeable. If you do resize it (within Photoshop), don't check "Scale Styles." This will pixelate the noise in the background layers and the artwork inside of the text/background. The font is hand crafted, so I couldn't just download it off of the interwebz. I used the pen tool in PS and hand made them, so they aren't going to be pixel perfect with the album's font. I included the font (found here) into the PSD. I also kept the original custom shapes because this font isn't as accurate as the ones I made, but the author promised us that he would update them whenever he can to make them more accurate and more authentic. Inside of this file you will see two groups: Group 1 - MX Fill: The letters are in their filled style, having a solid texture of a wall of graffiti (photo curtesy of my414oc from SCX.HU. I didn't use the official pattern because it was too small and I might have been infringing some copyrights), inset shadow, and bevel/emboss. I personally like this version better than group 2. Group 2 - MX Outline: This is the standard cover in the LP5 era. It is the same lettering in group one, but just an outline. The background is the same pattern included in the first group, just like the official cover of MX. Not much styling is applied to the background layer. Both of the groups' text layers have a solid color layer style to give a warm effect on the image, if you want to disable it, just uncheck it, if you want a cooler look, just change the color to a blue-ish/green-ish and mess around with the opacity. It takes a little while to get it perfect, so just play around with the settings on that. The kerning (The horizontal spacing between individual letters) was messed around with to make it look good. If you are trying to edit these text layers, you, first, need the font, & you need to change the letter spacing to make it look good to the eye. The way to do this is to enable the Character pallet and look for this menu: Changing this field will change the kerning on the letters. You can also change the kerning of groups of characters by selecting them and changing the kerning for that selection. The best part about this PSD is that you can choose whatever background you want for either group, and you can copy/paste the layer styles to any layer you want (even type layers!). To make an image file become the background, open it as a seperate window/tab in Photoshop, and then click Edit>Define Pattern. Name it whatever suits you best. Then go to the layer in which you want to change the background, double click it to bring up the layer styles window, and click on Pattern Overlay. Search for your image (it should be at the end if done correctly), and click. THERE YOU GO :D The file is ~33 MB (To be exact, it is 35,259,828 Bytes or 33.62 MB). The file is just a .psd with all of the images/textures/patterns included inside - so no other downloading needed :) There aren't ANY viruses, but if you guys aren't sure, I'll do whatever you guys recommend - I just want you guys to be happy. The file will be uploaded to DeviantArt later on this evening, as soon as I find some extra time. I uploaded it dA, which can be found here. College is coming up for me and I'm moving on Monday. I hope you guys enjoy it, as soon as I heard and saw the new album, I just HAD to do it. I don't contribute much (if any) to this board, so here is my first step to doing some favors back! ETIAW Font DOWNLOAD*needed to edit type layers deviantArt DOWNLOAD If you like it, favorite on dA, comment, email me, or just tell me if it helps at all. I just want to give back! Link to comment Share on other sites More sharing options...
Tash Posted August 12, 2011 Share Posted August 12, 2011 Wow awesome, you made my day Link to comment Share on other sites More sharing options...
RunForTheHills Posted August 12, 2011 Share Posted August 12, 2011 Fantastic work, opens perfectly in CS4 too BTW! Best thing about it is the customisable background, I'm sure we'll be seeing quite a few variations of this soon :smiley: Link to comment Share on other sites More sharing options...
WeddingDom Posted August 12, 2011 Share Posted August 12, 2011 Better than the original :P Link to comment Share on other sites More sharing options...
Tash Posted August 12, 2011 Share Posted August 12, 2011 The most awesome part about this is that it's for FREE! Link to comment Share on other sites More sharing options...
Lore Posted August 12, 2011 Share Posted August 12, 2011 Better than the original :P :nod: Link to comment Share on other sites More sharing options...
prowlingfox Posted August 12, 2011 Share Posted August 12, 2011 Well that was fast. Haha. Good work. Link to comment Share on other sites More sharing options...
ShotsIntheSky Posted August 12, 2011 Share Posted August 12, 2011 Wow. This is REALLY good. Hats off to you man :thumbsup::smiley::nice: Link to comment Share on other sites More sharing options...
Cleggy Posted August 12, 2011 Share Posted August 12, 2011 Very good! Link to comment Share on other sites More sharing options...
Zeya Posted August 12, 2011 Share Posted August 12, 2011 Better than the original :P YES. I'd really like this one to be honest, though I can't imagine ETIAW being in an album with this artwork cover. Link to comment Share on other sites More sharing options...
NumbersGirl Posted August 12, 2011 Share Posted August 12, 2011 Better than the original :P INDEED Seriously dude, I really like it. And I like the title better also. They should've hired you! Link to comment Share on other sites More sharing options...
jeremyy Posted August 12, 2011 Share Posted August 12, 2011 thank you :) Link to comment Share on other sites More sharing options...
Cleggy Posted August 12, 2011 Share Posted August 12, 2011 YES. I'd really like this one to be honest, though I can't imagine ETIAW being in an album with this artwork cover. All the more reason to like it. :lol: Link to comment Share on other sites More sharing options...
ramonbucard Posted August 12, 2011 Share Posted August 12, 2011 Beautiful. The font used in cover can download here http://www.dafont.com/every-truetype-is-a-wisefont.font Link to comment Share on other sites More sharing options...
dtack68 Posted August 12, 2011 Author Share Posted August 12, 2011 Update: Uploaded to deviantArt (Where I'll be updating it from now on). If it doesn't need an update, though, I'll keep the hosted file from my site up just in case dA goes haywire or something. Link to comment Share on other sites More sharing options...
dtack68 Posted August 12, 2011 Author Share Posted August 12, 2011 Beautiful. The font used in cover can download here http://www.dafont.com/every-truetype-is-a-wisefont.font THANK YOU! Hand crafting those are very tedious, and I never found it anywhere :( But thank you! I'll be updating it soon with the text layer as an option (Just in case there are some larger mistakes in the font). Link to comment Share on other sites More sharing options...
Strawberry Swinger Posted August 12, 2011 Share Posted August 12, 2011 Better than the original :P absolutely. the original is awful... Link to comment Share on other sites More sharing options...
busybeeburns Posted August 12, 2011 Share Posted August 12, 2011 great stuff! :thumbsup: Link to comment Share on other sites More sharing options...
dtack68 Posted August 12, 2011 Author Share Posted August 12, 2011 UPDATE: I included the font found here. I also kept the original custom shape text I hand made because they are more accurate than the font, but I believe it will do. And thanks everyone for the nice messages :D Link to comment Share on other sites More sharing options...
coldplay_are_forever Posted August 12, 2011 Share Posted August 12, 2011 Sorry guys? When I download the font, how do I put it on Word or whatever? I'm not very good with this stuff, so thank you so much for any explanation :nice:. Link to comment Share on other sites More sharing options...
Mark Posted August 12, 2011 Share Posted August 12, 2011 Sorry guys? When I download the font, how do I put it on Word or whatever? I'm not very good with this stuff, so thank you so much for any explanation :nice:. 1. Download the .zip file. 2. Unzip the file. You can do this either by extracting via Windows Explorer or programs such as 7Zip. 3. Open up a new window, and go to your Control Panel: head to Fonts. 4. Drag the fonts from one window to the next. 5. Revel in the fact you are now awesome. Link to comment Share on other sites More sharing options...
Batman Posted August 12, 2011 Share Posted August 12, 2011 Wow thanks alot for this artwork, I've already messed around with it a lil' bit :whistle: And it works perfectly in PS CS3! Oh and, I agree, it's way fancier than the original cover art :anxious: Link to comment Share on other sites More sharing options...
coldplay_are_forever Posted August 12, 2011 Share Posted August 12, 2011 @ mrkjhnwht: thank you! It works perfectly. p.s. I love point 5 on your list :wacky:. Link to comment Share on other sites More sharing options...
Mark Posted August 12, 2011 Share Posted August 12, 2011 @ mrkjhnwht: thank you! It works perfectly. p.s. I love point 5 on your list :wacky:. No problem :) If you haven't already noticed, "." and "," are tears, "-" or "_" is the Moving to Mars rocket cloud and "Ø" is the Major Minus eye ;) Link to comment Share on other sites More sharing options...
the_gloaming09 Posted August 12, 2011 Share Posted August 12, 2011 I actually think I like your cover more than theirs Link to comment Share on other sites More sharing options...


(1).thumb.png.4eba209dc40059c13694859b20e23ec1.png)

Recommended Posts
Create an account or sign in to comment
You need to be a member in order to leave a comment
Create an account
Sign up for a new account in our community. It's easy!
Register a new accountSign in
Already have an account? Sign in here.
Sign In Now